OpenShift Container Platform (OCP)
Overview
This guide will demonstrate how to install Ondat onto a OpenShift Container Platform (OCP) cluster using either the Helm Chart or Ondat kubectl / oc plugin.
Prerequisites
1 - Cluster & Node Prerequisites
The minimum cluster requirements for a non-production installation of ondat are as follows:
- Linux with a 64-bit architecture.
- 2 vCPU and 4GB of RAM per node.
- 3 worker nodes in the cluster and sufficient Role-Based Access Control (RBAC) permissions to deploy and manage applications in the cluster.
- Make sure the OS on your nodes are compatible with Ondat. See the Ondat Prerequisites for all supported linux distributions.
- Depending on how you have deployed OpenShift, be it either in a public or private cloud - ensure that you have persistent storage available to provide local storage for Ondat’s embedded
etcdcluster component that is used to manage the Ondat’s configuration and volume state.
For a comprehensive list of prerequisites and how to build a production installation of Ondat please refer to Ondat Prerequisites
2 - Client Tools Prerequisites
The following CLI utilities are installed on your local machine and available in your $PATH:
Ondat can be installed either via Helm Chart or using our command-line tool. Depending on which installation method you choose you will require either:
Installation of Ondat
Step 1 - Adding a Cluster
The Ondat Portal is how you can license and get the commands for installing Ondat.
- Either login or create an account on the Ondat Portal.
- Choose the ‘Install Ondat on your cluster’ or ‘Add cluster’ options in the UI.
- Add a Name for your cluster and where it is going to be located. This will allow you to view the same prerequisites listed above.
Step 2 - Choosing the Installation Method
You can use either the oc-storageos CLI or Helm 3 CLI to install Ondat onto your cluster. The most common way is to use Helm due to its popularity in the Kubernetes community, but both are fully supported and described below.
Step 3a - Installing via Helm
The Ondat Portal UI will display the following cmd that can be used to install Ondat using Helm. The command created will be unique for you and the screenshot below is just for reference.
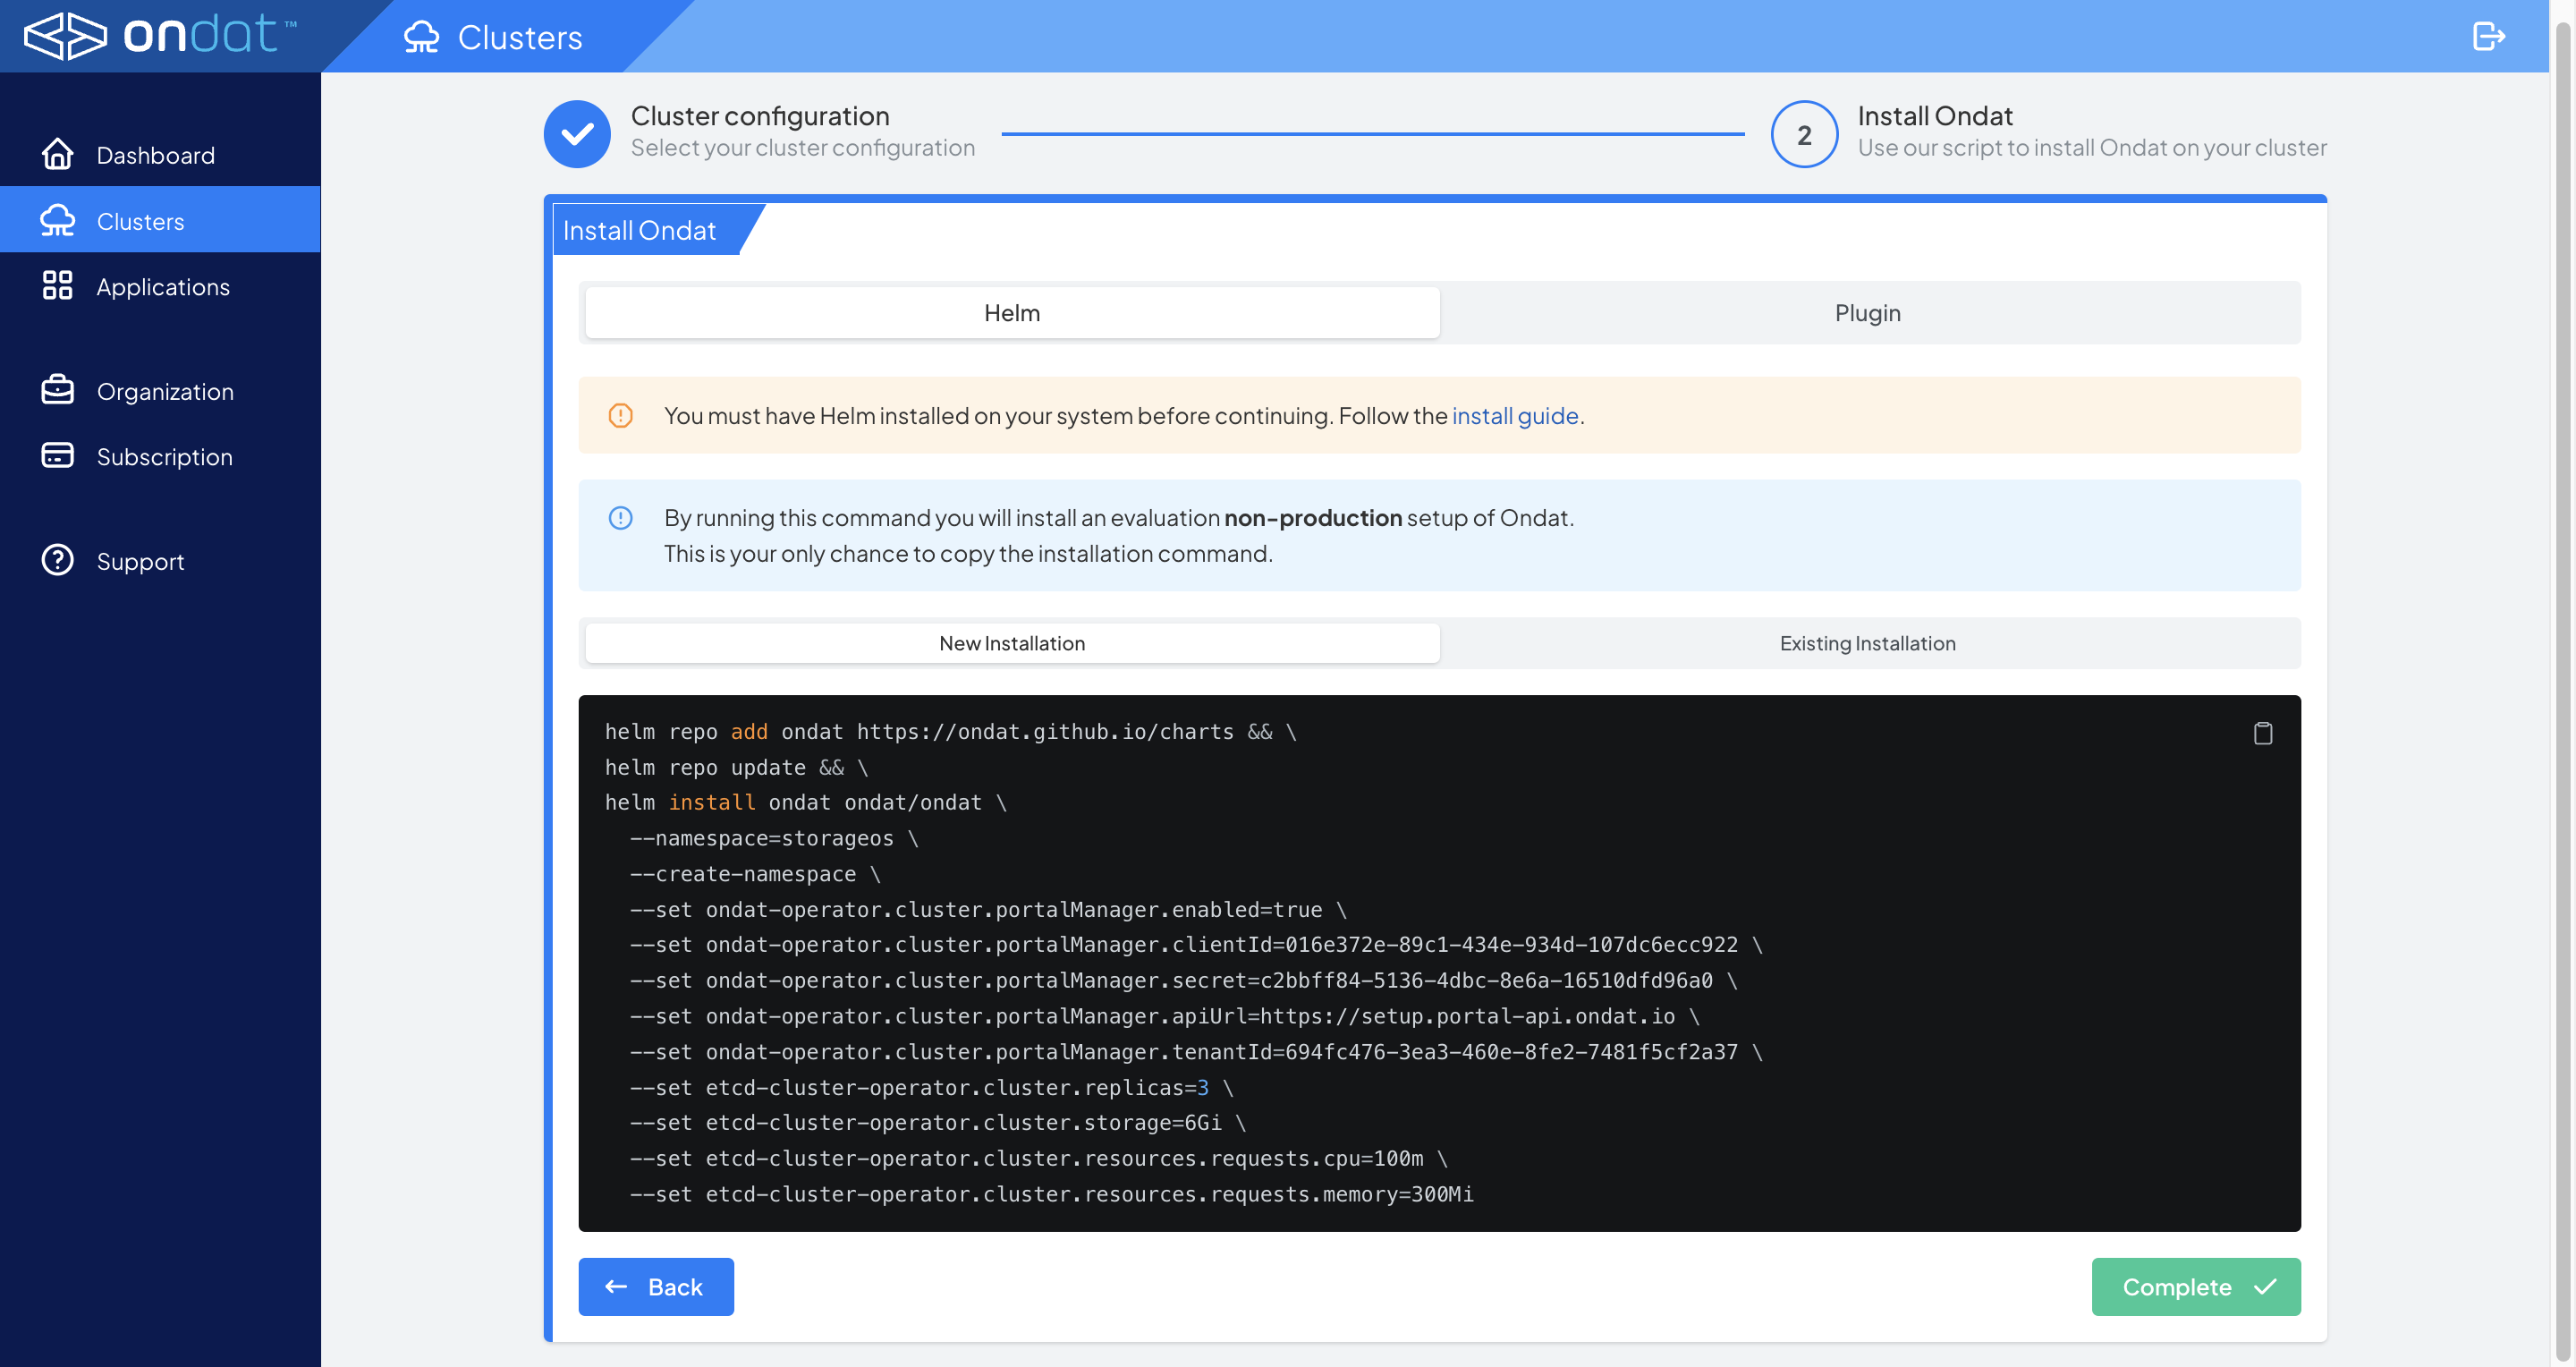
The first two lines of the command adds the Ondat Helm repository and ensures a updated local cache. The remaining command installs Ondat via Helm with a set of basic install parameters that are sufficient for a basic trial installation and to connect the Ondat installation with your portal account for licensing. The installation process may take a few minutes. The end of this guide contains information on verifying the installation and licensing.
Step 3b - Installing via kubectl-storageos plugin
The Ondat Portal UI will display the following cmd that can be used to install Ondat using the oc-storageos plugin. The command created will be unique for you and the screenshot below is just for reference.
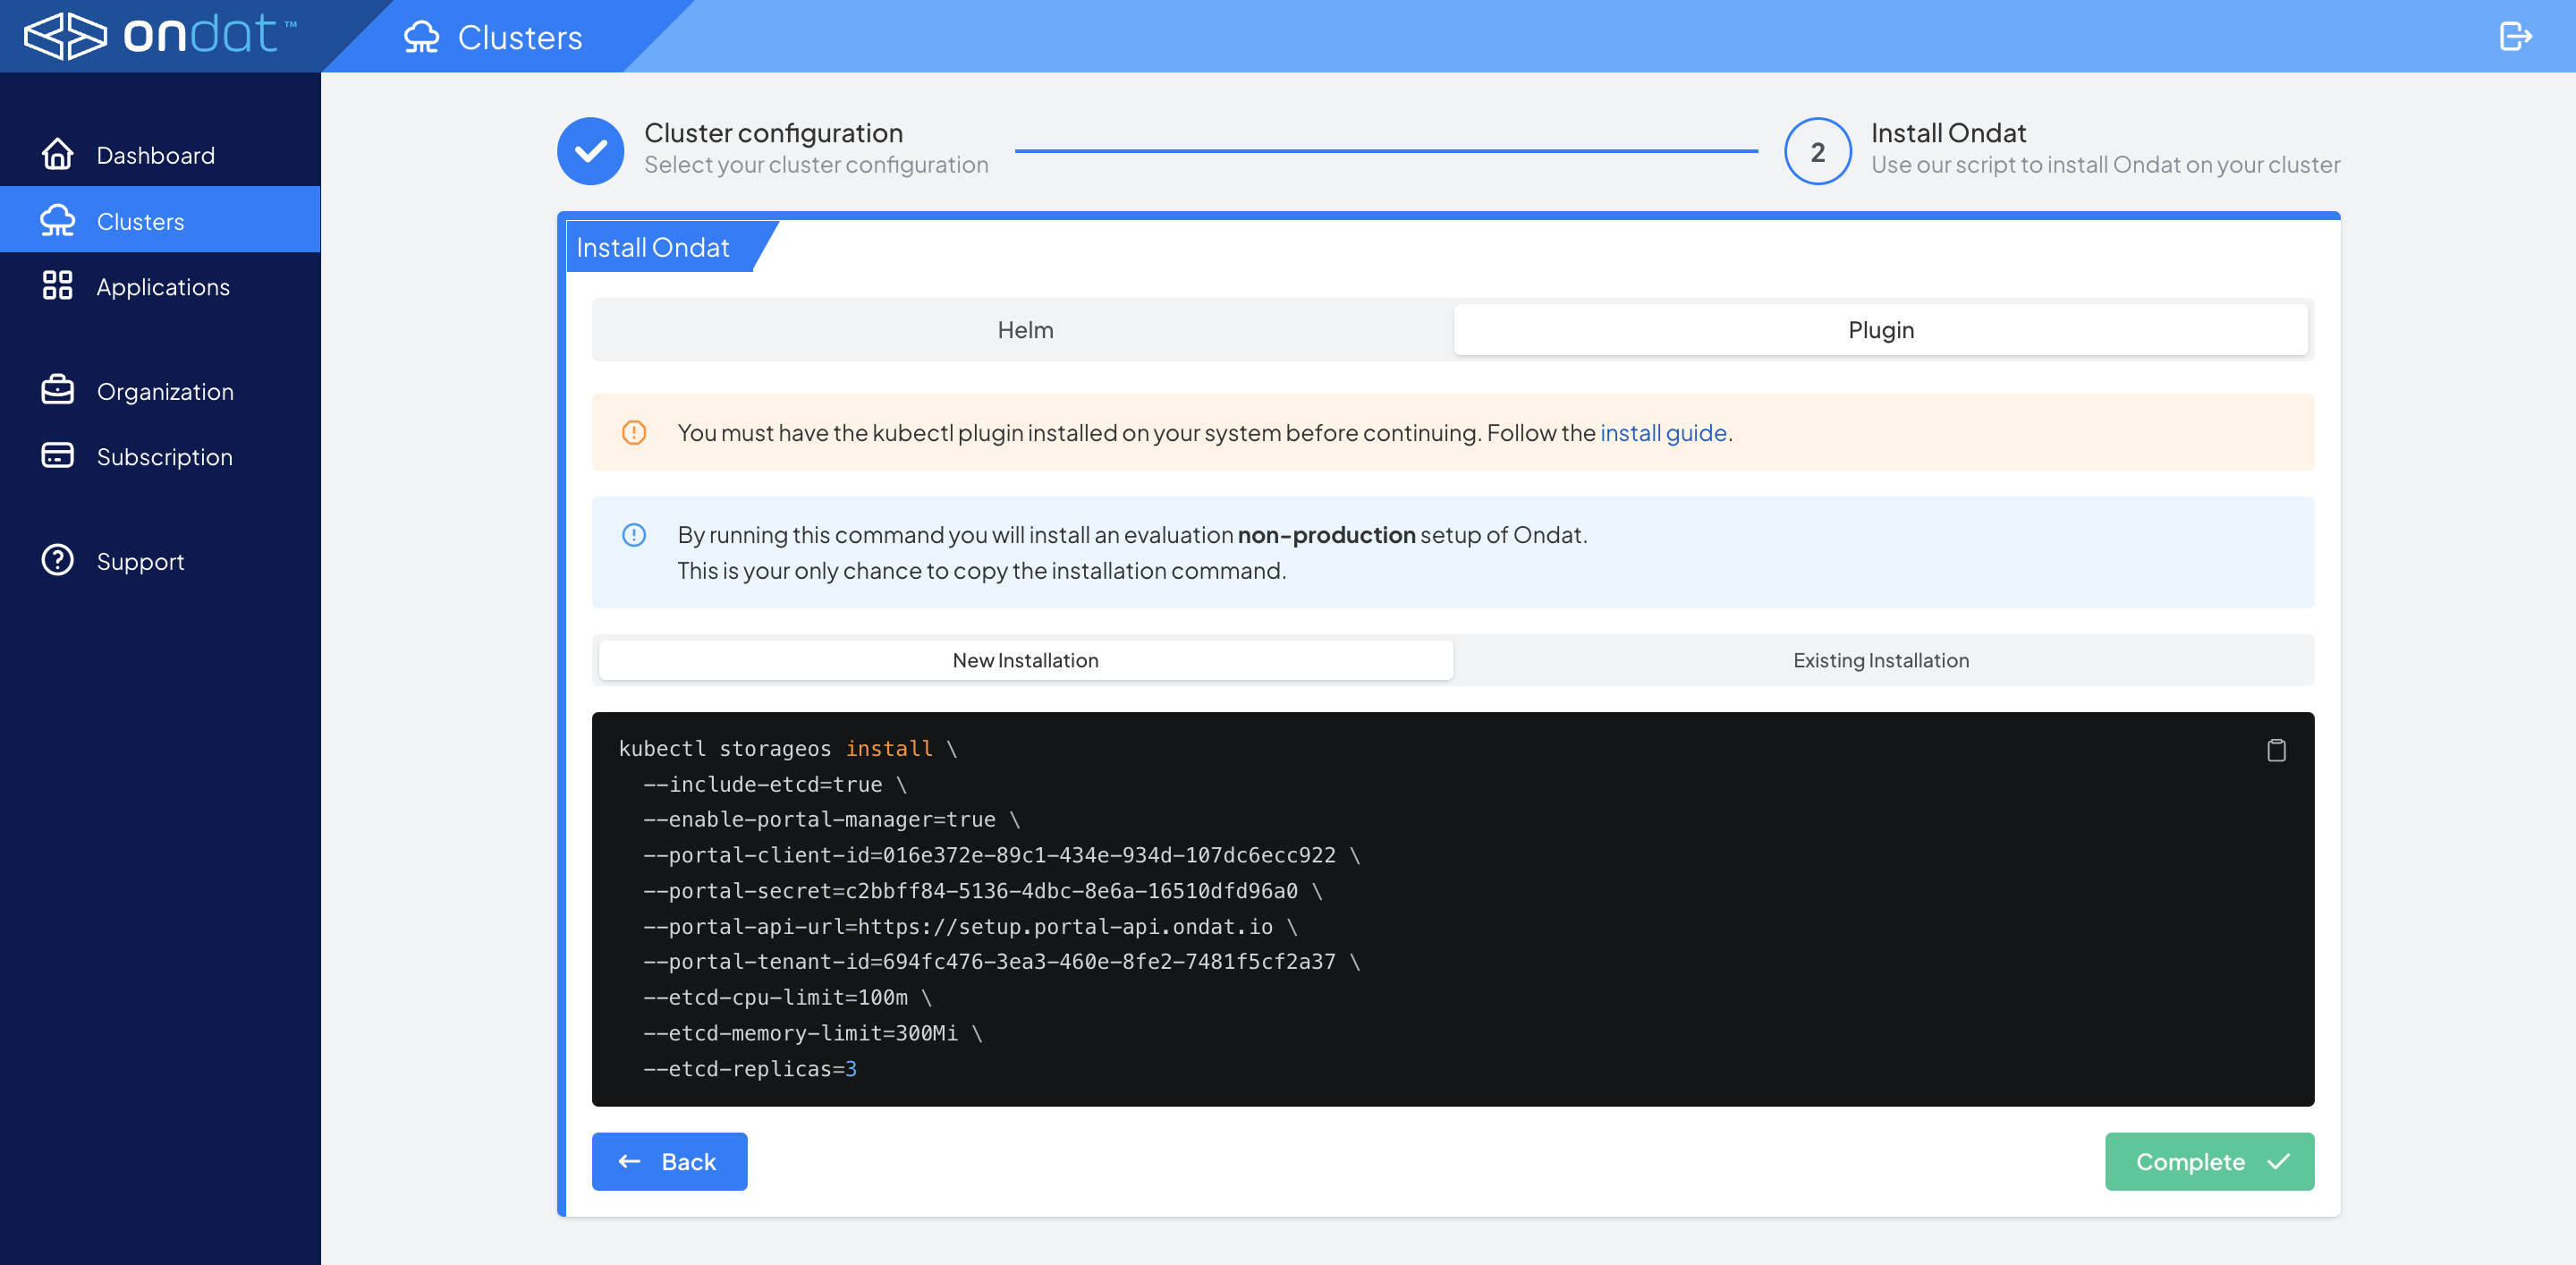
The command that is provided by the Portal is unique to you and uses the kubectl-storageos plugin command with a set of basic install parameters that are sufficient for a basic trial installation and to connect the Ondat installation with your portal account for licensing. The installation process may take a few minutes. The end of this guide contains information on verifying the installation and licensing.
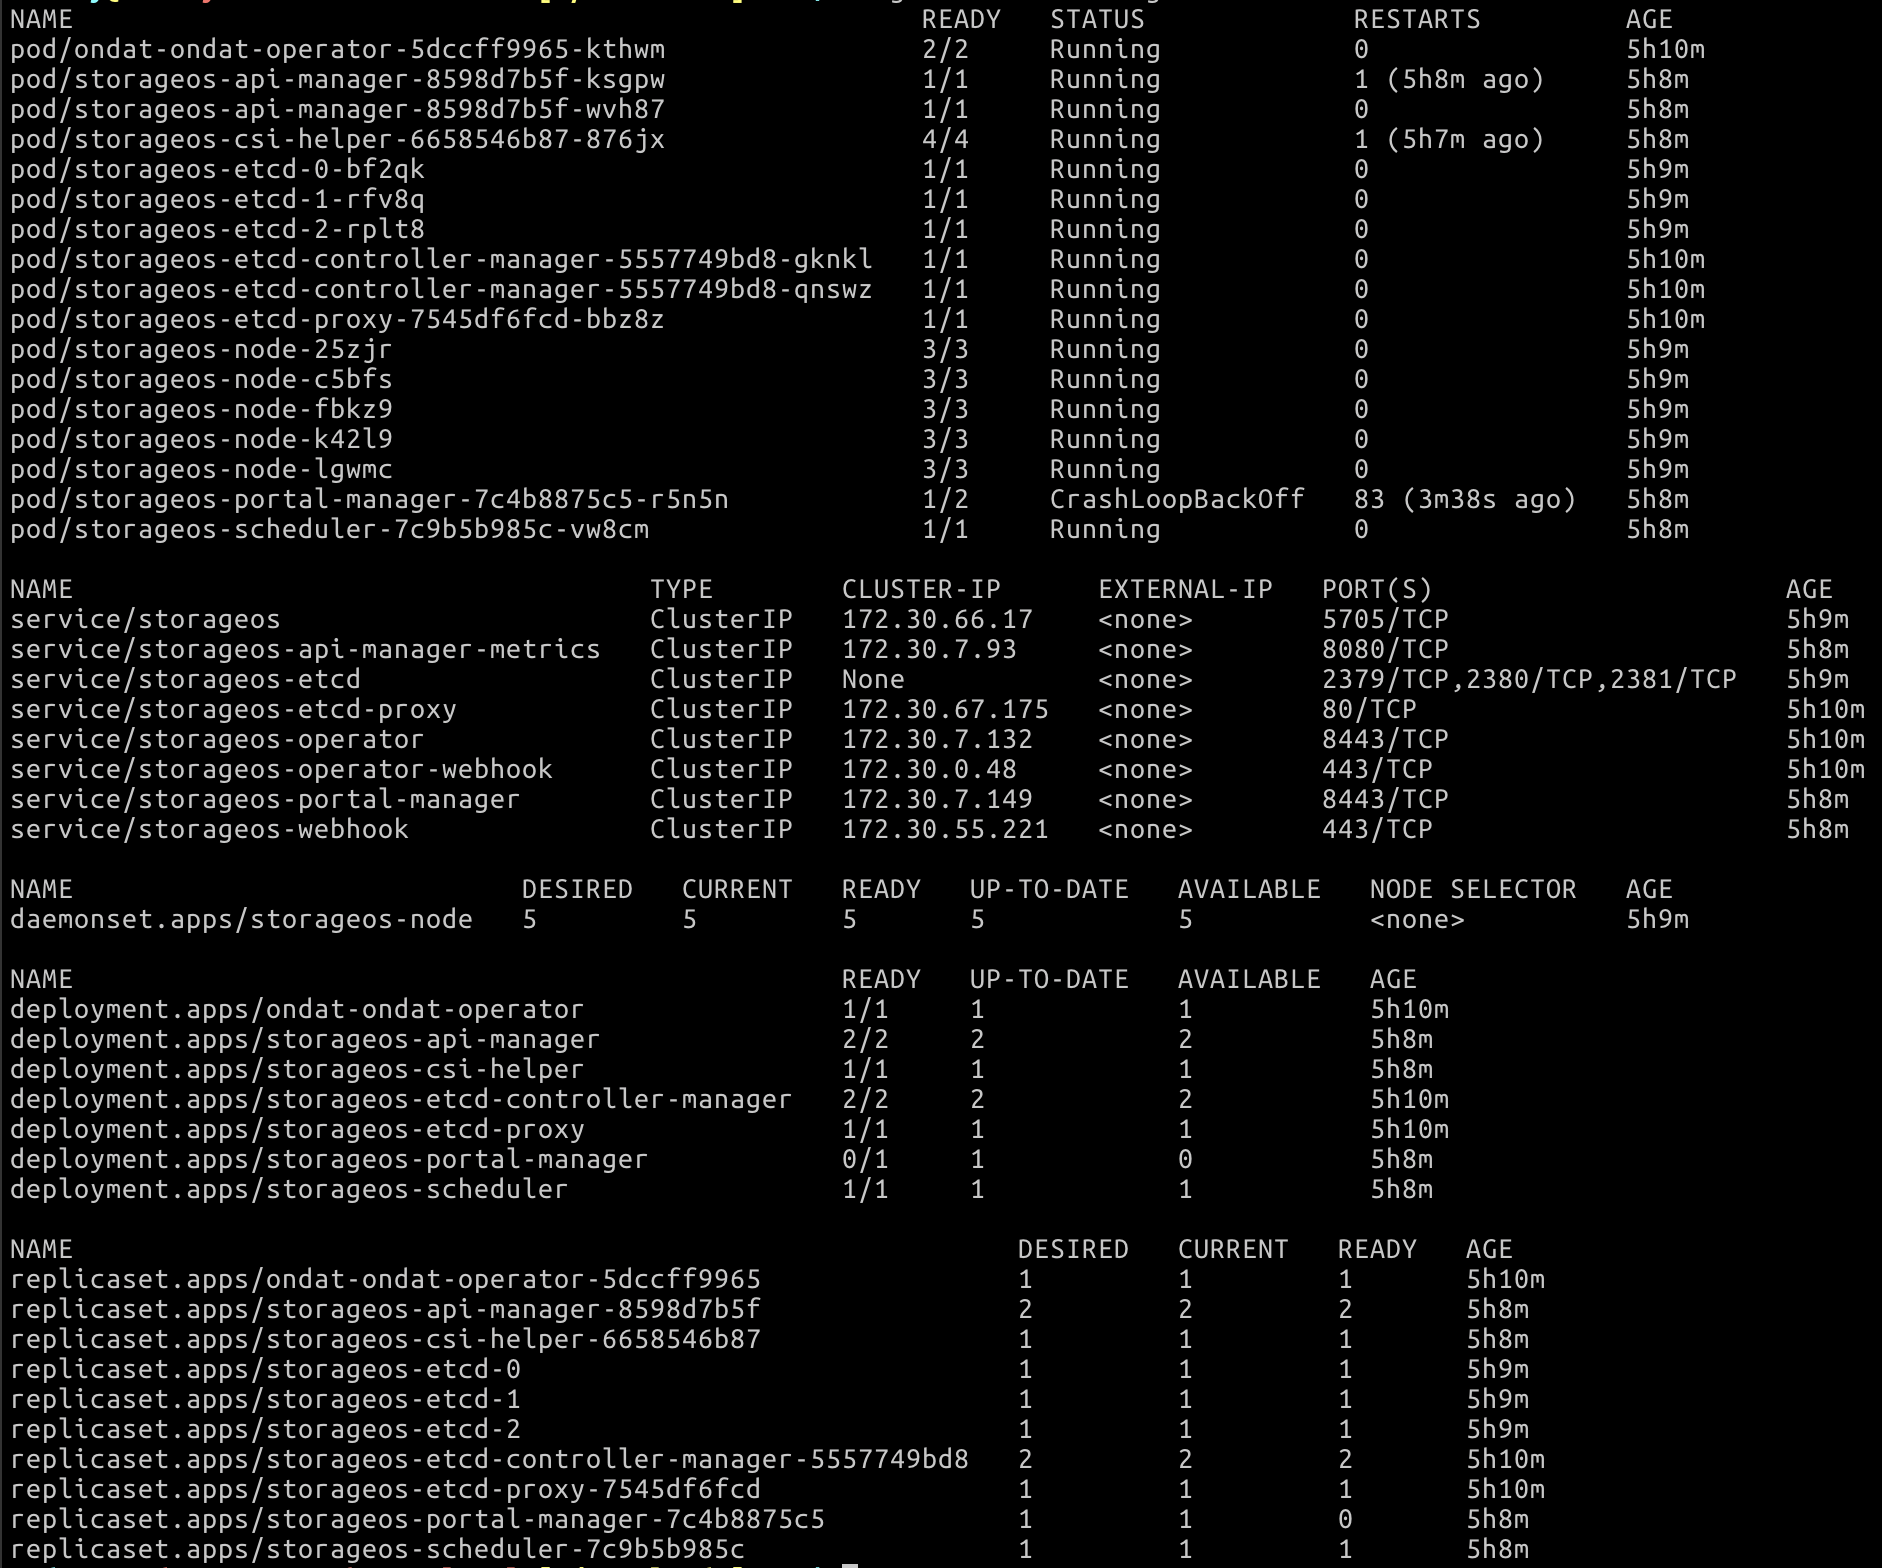
Step 4 - Verifying Ondat Installation
Run the following oc commands to inspect Ondat’s resources (the core components should all be in a RUNNING status)
oc get all --namespace=storageos
oc get all --namespace=storageos-etcd
oc get storageclasses | grep "storageos"
Once all the components are up and running the output should look like this:
Step 5 - Applying a Licence to the Cluster
Newly installed Ondat clusters must be licensed within 24 hours. For details of our Community Edition and pricing see here.
To licence your cluster with the community edition:
- On the Clusters page select ‘View Details’
- Click on ‘Change Licence’
- In the following pop-up select the ‘Community Licence’ option then click ‘Generate’
This process generates a licence and installs it for you. Now you are good to go!