How To Backup & Restore Using Snapshots with CloudCasa
Overview
This guide will walk you through how to use the Ondat Snapshots feature to backup and restore your Kubernetes applications using CloudCasa. Before starting please consult the Snapshots Concepts page for an overview of the feature.
We’ll now run through the steps required to configure and utilise the feature:
- Pre-requisites.
- Installing Ondat.
- Setting up a CloudCasa account and deploying the CloudCasa agent.
- Installing Kubernetes Snapshot Controller.
- Configuring the Ondat VolumeSnapshotClass.
- Backup and Recovery functions walkthrough:
- Create a dummy application.
- Setup a backup policy.
- Define and run a backup.
- Run a restore operation for the dummy application.
Prerequisites
The following pre-requisites must also be met:
- The registered cluster must be Kubernetes version 1.17 or higher to utilize CSI snapshots. The CSI driver must support volume snapshots at the
v1beta1API level. For a list of vendors that support CSI snapshots, review the Kubernetes CSI Drivers documentation. The Ondat driver is supported. kubectlmust be installed and configured.- You will need cluster administrative access to install CloudCasa’s lightweight agent on your cluster. While registering your cluster in the CloudCasa user interface (UI), each cluster will be given a unique YAML file to be applied to your cluster.
- Network access from your cluster outgoing to the CloudCasa service (
agent.cloudcasa.io) on port443.
Procedure
Step 1 - Installing Ondat
Ondat Snapshots were introduced in v2.8.0. If you are installing Ondat for the first time then please follow the instructions
here. If you are upgrading an existing Ondat deployment then please follow the instructions
here.
Step 2 - Setting up a CloudCasa Account & Deploying the CloudCasa Agent
-
Navigate to CloudCasa’s Get Started page to sign up for a free account by providing the login details. Then sign in to your account after verifying the registered email address, which will take you to the CloudCasa dashboard.
-
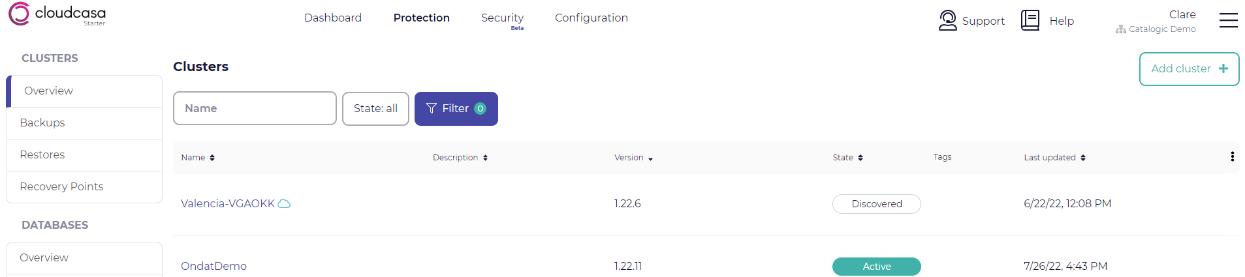
After logging in to CloudCasa, navigate to Protection tab » Clusters Overview and click on the Add Cluster button at the top right.
-
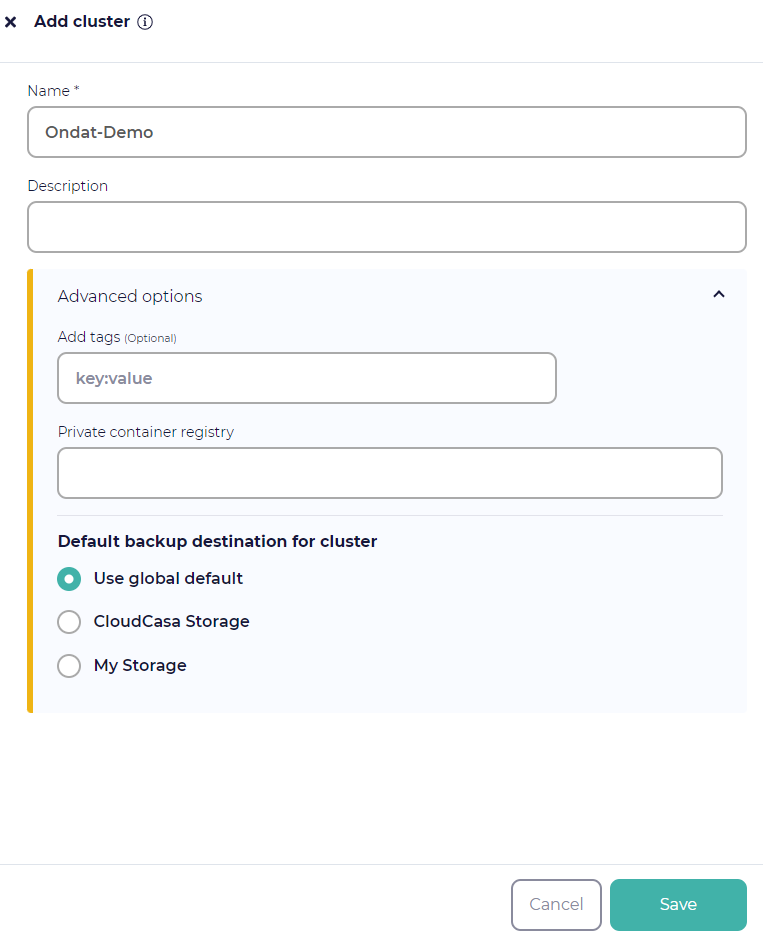
Provide the cluster name and description, then click on the Save button.
-
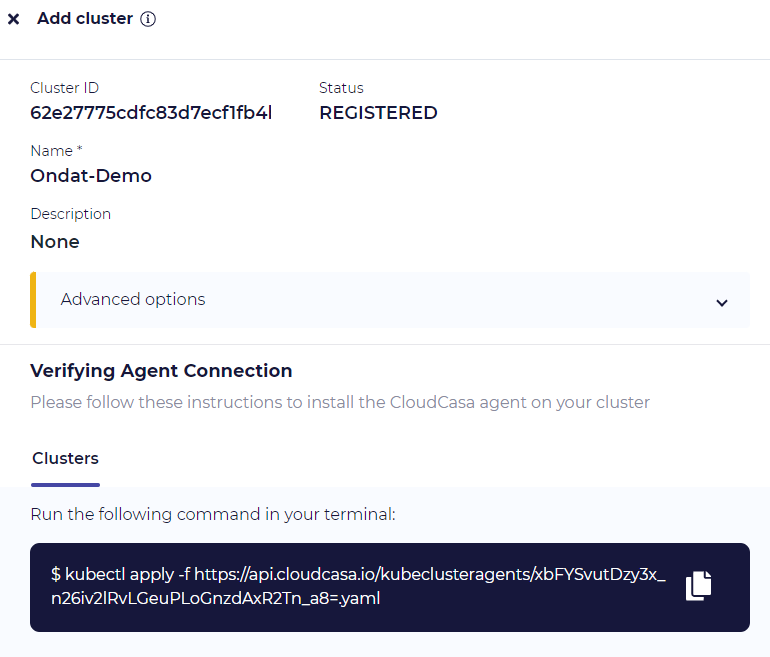
This will display a kubectl command to run to install the agent.
-
Run the Kubectl command on your cluster and confirm that the registered Kubernetes cluster moves into the Active state in the CloudCasa UI. This should take no more than a couple of minutes. Your CloudCasa agent has now successfully been deployed.
Step 3 - Installing the Kubernetes Snapshot Controller
By default with CloudCasa we provide the required Kubernetes snapshot CRDs however in order to use the Kubernetes snapshot feature the snapshot-controller must be installed.
- The snapshot controller monitors the Kubernetes API server for
VolumeSnapshotandVolumeSnapshotContentCRDs and forwards the necessary requests to the Ondat CSI plugin. One can install the controller with the following commands:
kubectl apply -f https://raw.githubusercontent.com/kubernetes-csi/external-snapshotter/release-6.0/deploy/kubernetes/snapshot-controller/rbac-snapshot-controller.yaml
kubectl apply -f https://raw.githubusercontent.com/kubernetes-csi/external-snapshotter/release-6.0/deploy/kubernetes/snapshot-controller/setup-snapshot-controller.yaml
⚠️ It is important that
v6.0is used for the CRDs and the snapshot-controller. Other versions may work or may appear to work, but have not been formally tested and ratified by Ondat.v6.0andv6.1of the snapshot controller require Kubernetes version1.20or above.
Step 4 - Backup & Recovery Functions walkthrough
In the following steps, we’ll create a dummy application and run through the steps required to back up and recover it.
4.1 - Create a Dummy Application
Start by creating an example deployment in a new namespace ondat-and-cloudcasa-test, which utilises a Ondat PVC:
kubectl create namespace ondat-and-cloudcasa-test
Then create a deployment and PVC in the namespace using:
cat <<EOF | kubectl apply -f -
apiVersion: v1
kind: PersistentVolumeClaim
metadata:
  name: mypvc
  namespace: ondat-and-cloudcasa-test
spec:
  storageClassName: storageos
  accessModes:
    - ReadWriteOnce
  resources:
    requests:
      storage: 2Gi
---
apiVersion: apps/v1
kind: Deployment
metadata:
  name: myapp-deployment
  namespace: ondat-and-cloudcasa-test
spec:
  replicas: 1
  selector:
    matchLabels:
      app: myapp
  template:
    metadata:
      labels:
        app: myapp
    spec:
      containers:
      - name: date
        image: debian:9-slim
        command: ["/bin/sh","-c"]
        args: ["while true; do /bin/date | /usr/bin/tee -a /mnt/date ; /bin/sleep 5; done"]
        volumeMounts:
          - mountPath: /mnt
            name: data-mount
      - name: sidecar
        image: debian:9-slim
        command: ["/bin/sh","-c"]
        args: ["/bin/sleep 3600"]
        securityContext:
          privileged: true
        volumeMounts:
          - mountPath: /mnt
            name: data-mount
      volumes:
      - name: data-mount
        persistentVolumeClaim:
          claimName: mypvc
EOF
This deployment creates a pod with 2 containers. The date container will simply append the date to stdout and /mnt/date every 5 seconds:

The sidecar container simply mounts in the PVC under /mnt and then lies dormant. This container will be used during the snapshot process to quiesce the filesystem so a consistent snapshot can be taken. It serves no other purpose. Notice how this container must have the privileged flag set to true. This is necessary in order to run the fsfreeze command.
4.2 - Setup a Backup Policy
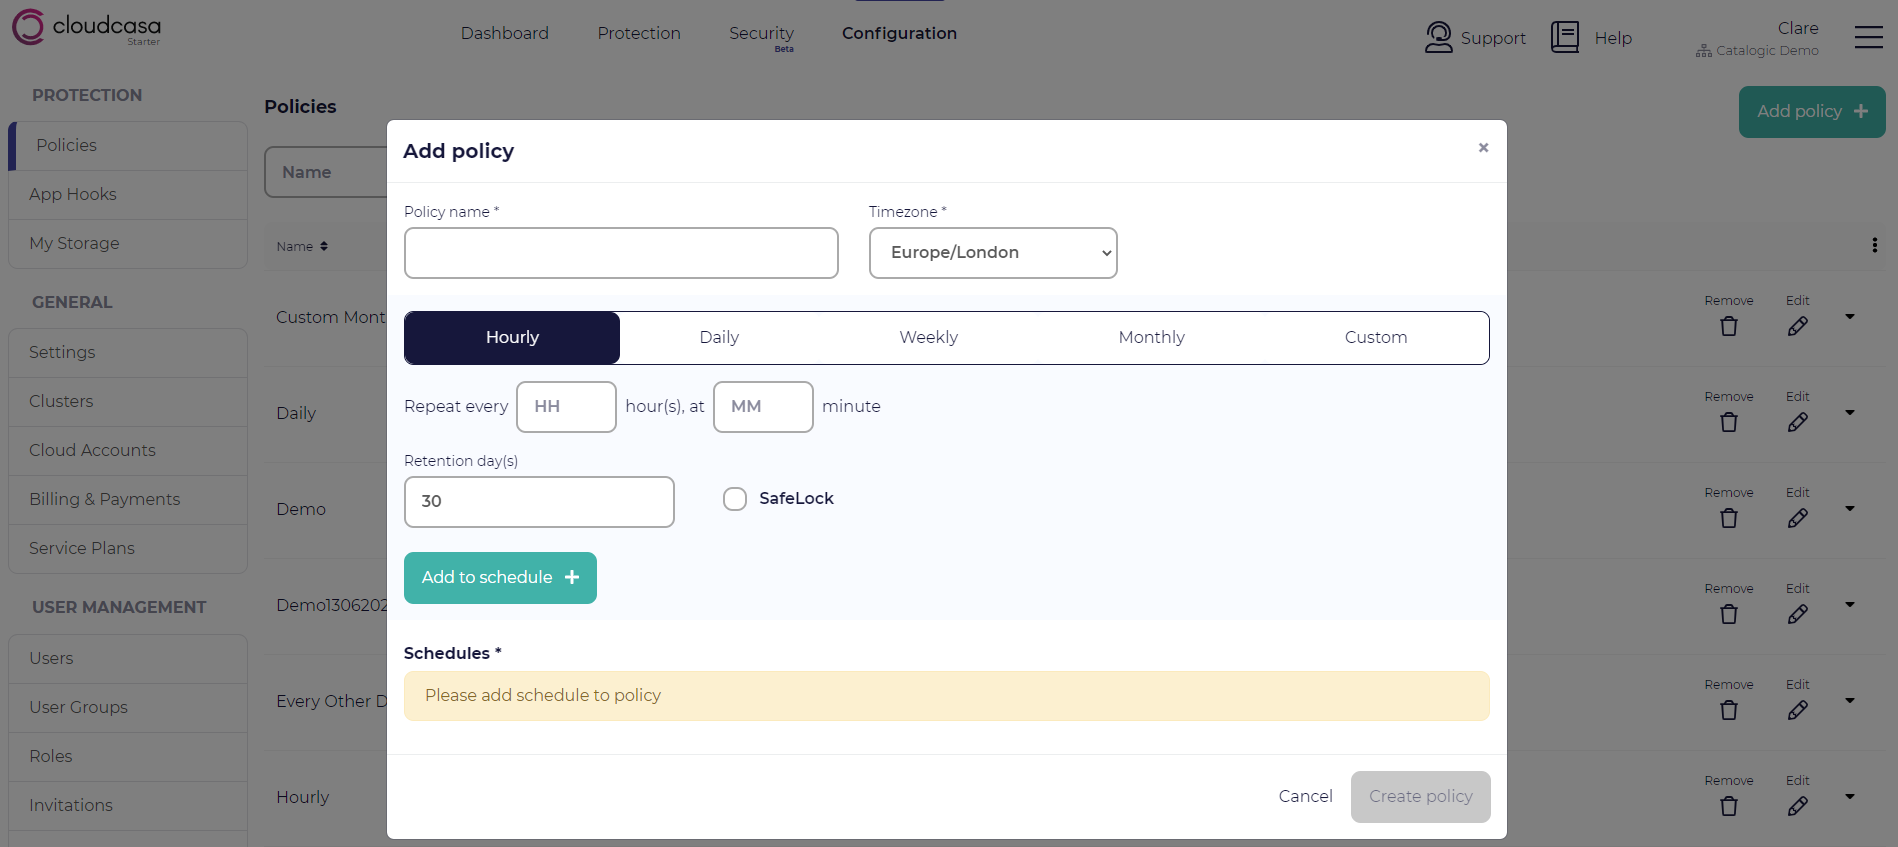
A backup policy allows you to define when backups that use it will run and for how long they will be retained. You can have multiple schedules with different retention times in one policy. For example, a policy may specify the creation of hourly backups that are retained for 7 days, and daily backups that are retained for 30 days.
Navigate to the Policies tab via Configuration » Protection » Policies.
- Create a Policy by clicking on the Add new policy button. Provide the required information, then click on the Create Policy button.
4.3 - Configure the Ondat VolumeSnapshotClass
In order to utilise the Ondat CSI plugin with the Kubernetes snapshot feature you must provide a VolumeSnapshotClass for the Ondat CSI plugin. Once the snapshot-controller has been installed edit your StorageOSCluster via the following command.
kubectl -n storageos edit storageosclusters.storageos.com storageoscluster
Within here add the volumeSnapshotClassName line under snapshots - as per the following:
  snapshots:
    volumeSnapshotClassName: cloudcasa-csi-storageos-com
This will prompt the Ondat operator to create a VolumeSnapshotClass named cloudcasa-csi-storageos-com and configure it for use with CloudCasa. You can view the VolumeSnapshotClass by running:
kubectl get volumesnapshotclasses
and:
kubectl describe volumesnapshotclasses cloudcasa-csi-storageos-com
4.4 - Define & Run a Backup
-
Navigate to the Dashboard tab. Click on Define Backup. Provide Backup Name, and select the Cluster for which you are defining a backup.
-
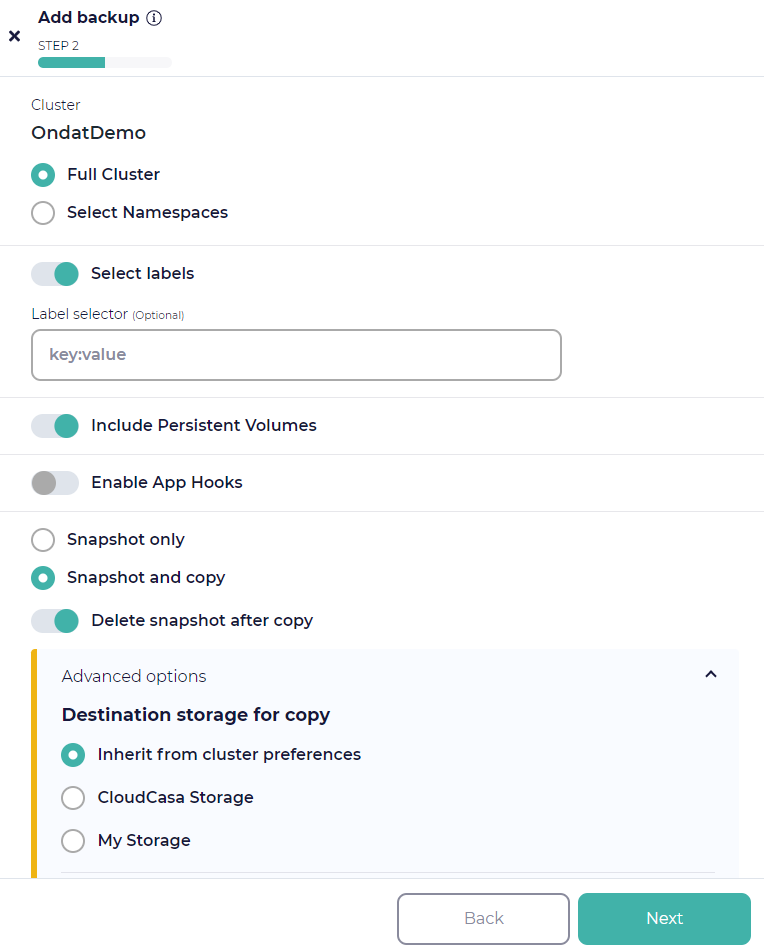
Select either Full Cluster, a Specific Namespace, or provide a Label selector (Optional). If backing up a specific namespace, enter the name of the namespace you want to protect.
-
For the backup operation, choose whether to snapshot your PV’s. Then select one of the two available options:
-
Snapshot only.
-
Snapshot and copy.
💡 The “Snapshot and copy” option is only available with a paid subscription.
💡 If you want to run pre and post-backup commands to enable application consistent backups, select “Enable app hooks” and enter the appropriate pre and post backup app hook definitions. You will need to have defined custom hooks under Configuration/App Hooks to quiesce the application and filesystem. This isn’t necessary for all applications. We plan to add a standardised template for pre and post backup Ondat app hooks using fsfreeze in the near future. If you need assistance with these, get in contact with us via casa@cloudcasa.io
-
On the next page, enable Run now to run the Backup operation immediately and provide Retention days (the retention period is just for this ad-hoc run). Click on the Create button. This will create a Backup definition.
-
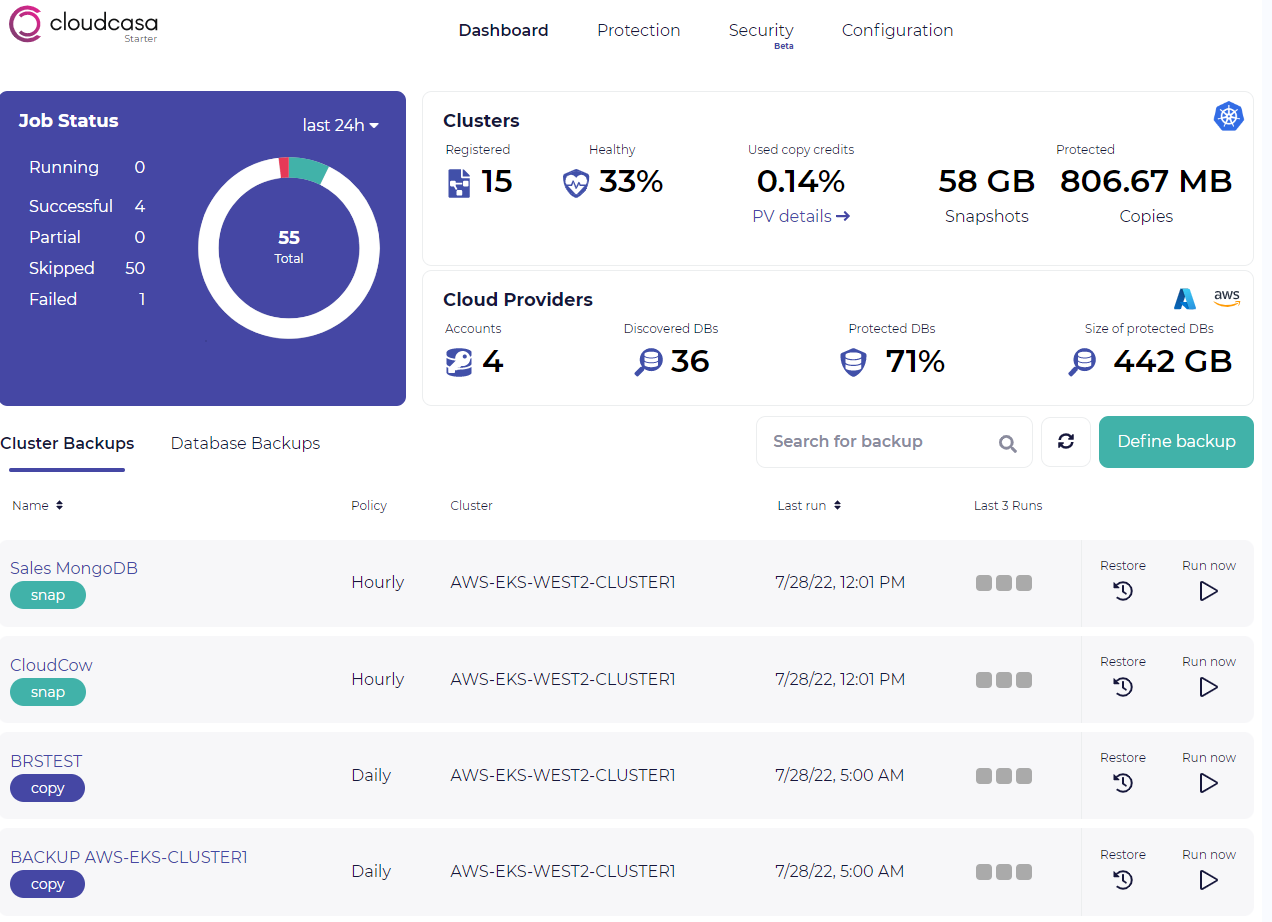
Navigate to the Dashboard tab and find the Cluster Backup that you want to run. Click the Run now button on its line. You will see the job running in the dashboard’s Activity tab. Verify that it completes successfully.
4.5 - Run a Restore Operation For the Dummy Application
-
Let’s setup a disaster recovery scenario, by deleting our dummy application and the associated namespace
kubectl delete -n ondat-and-cloudcasa-test deployments.apps myapp-deployment kubectl delete namespaces ondat-and-cloudcasa-test -
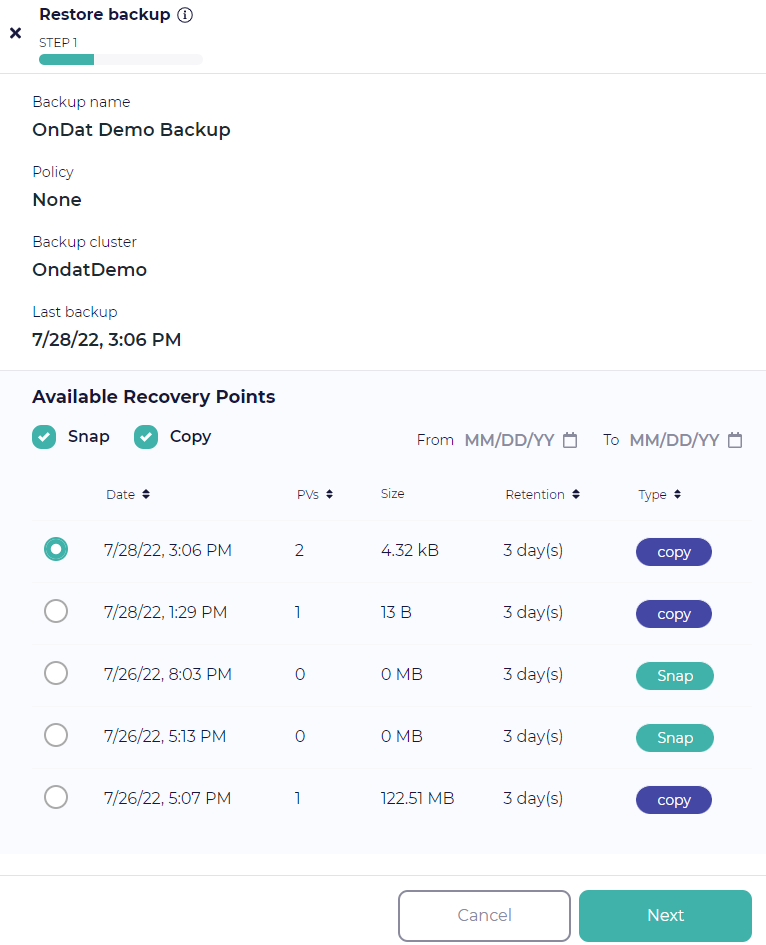
Now let’s recover our dummy application. Go back to the Cluster Backups tab on the Dashboard and click the Restore icon next to your backup definition in the list.
-
When the restore page opens, select a specific recovery point by choosing it from the list of available recovery points. Then click Next button.
-
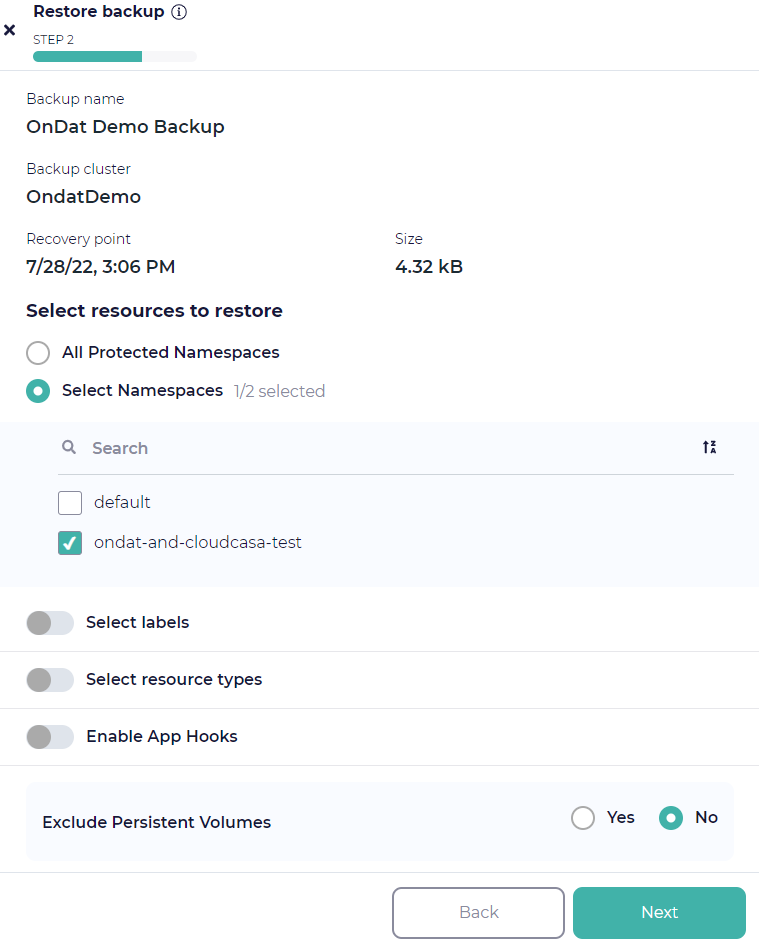
On the next page you can choose whether to restore all namespaces in the backup, or only selected namespaces. If user choose the latter, a list of namespaces will be displayed from which you can select the namespace(s) for which the restore operation will be performed. Remember that only namespaces included in the backup will be shown. For the demo, we will recover the full ondata-and-cloudcasa-test namespace. We also support the recovery of specific resource types, and utilising post-restore scripts for the recovery via enabling app hooks.
-
Note that existing namespaces cannot be over-written, so if you want to restore an existing namespace to a cluster, you need to delete the old one first. You can also rename namespaces when restoring (later).
-
You can add labels to be used to select resources for restore as well. These are key: value pairs, and will not be validated by the UI. We can add them one at a time or add multiple pairs at once, separated by spaces.
-
Finally, we need to choose whether or not to restore PV snapshots. If you toggle off the Exclude persistent volumes option, PVs will be restored using the snapshots or copies associated with the recovery point you’ve selected.
-
Remember that if you have selected specific namespaces or labels for restore, only PVs in the namespaces or with the labels you’ve selected will be restored.
-
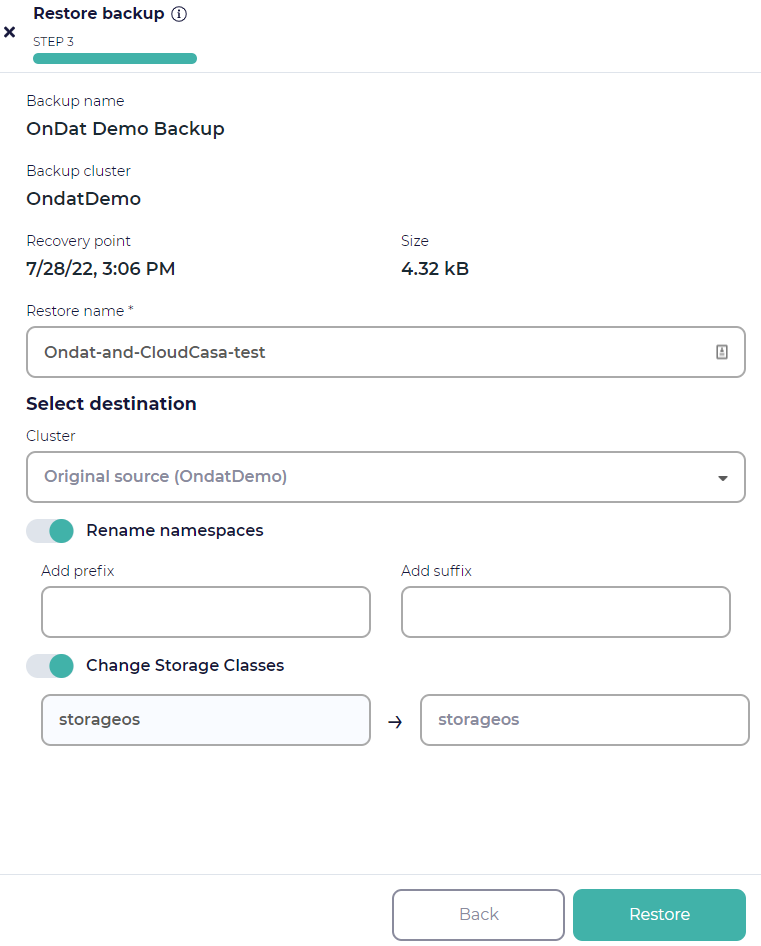
On the Next page, you will be presented with few more options.
-
Provide the Restore name for the restore job. Restore jobs have names so that users can easily track the restore job status.
-
The system will also save the job under its name so that you can modify and re-run it later.
-
On the next step, you can choose an alternate cluster to restore to. By default, the restore will go to the original cluster. You can choose to rename restored namespaces by adding a prefix and/or suffix and change the storage classes if desired.
-
Remember that all the restored namespaces will have these prefixes or suffixes added, so if user want to rename only specific namespaces, you should run multiple restores and select those namespaces explicitly.
-
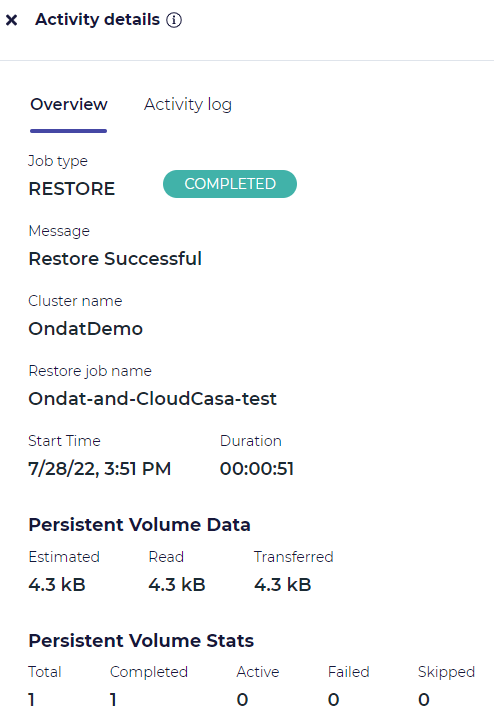
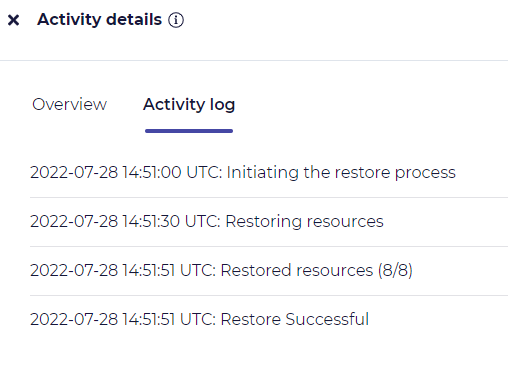
Finally, click the Restore button and CloudCasa will do the rest! You can watch the progress of the restore job in the progress pane. You can also edit and re-run it, if you wish, under the cluster’s Restore tab.
-
Confirm the application is back up and running:

-
Finally let’s view the contents of the
/mnt/datein the application’s pod: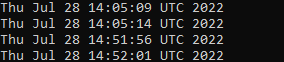
You can see the 44 min gap here which aligns with the snapshot time of 14:05 and the restore time of 14:51
Recap
Congratulations, You’re done! That’s all there is to it! Now you can sit back and relax, knowing that you can now take ad-hoc or scheduled backup and perform restores of your Kubernetes cluster resources, Ondat persistent volumes, and cloud-native applications.
Any Further Questions?
Get in touch with us at https://www.ondat.io/contact or casa@cloudcasa.io